


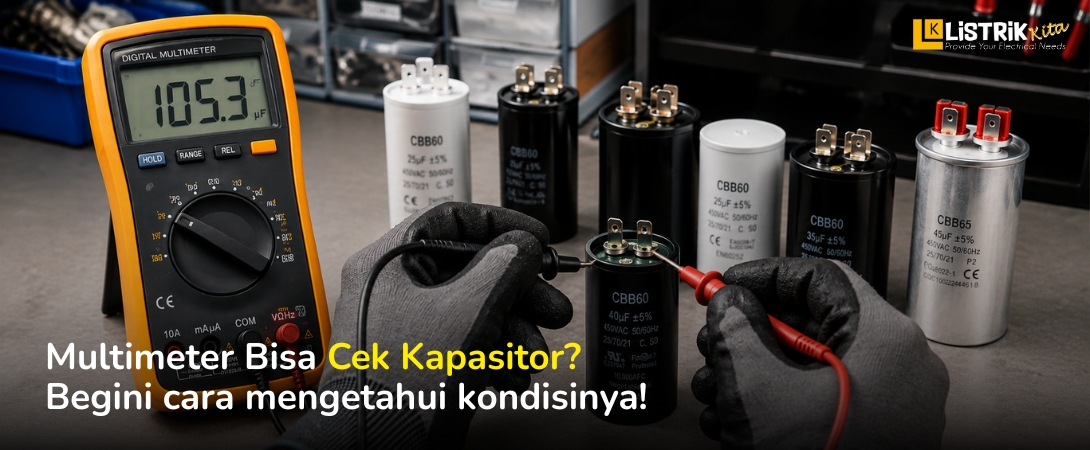
Capacitors are common components found in many electrical devices and circuits. They store electrical charge and release it when needed to support the operation of a circuit. Over time, however, a capacitor can lose its performance or become damaged. When this happens, the electrical equipment may not work properly.
One simple way to check a capacitor is by using a digital multimeter. With the right multimeter, you can measure the capacitor's capacitance and compare the result with the value printed on its body. Before starting the test, make sure the process is done safely because a capacitor can still hold an electrical charge even after the power has been switched off.
Why Should You Check a Capacitor with a Multimeter?
A faulty capacitor cannot always be identified just by looking at it. Some capacitors may look perfectly normal even though their capacitance has already decreased. This is why using a multimeter can provide a better indication of the component's condition.
Common signs of a capacitor problem include difficulty starting a device, reduced circuit performance, a swollen body, leakage, or a measured value that is significantly different from its rated capacitance.
The Function of a Capacitor in an Electrical Circuit
Capacitors are used for different purposes, including filtering voltage, temporarily storing electrical energy, and supporting the operation of certain electric motors. When a capacitor becomes weak, these functions can also be affected.
Signs of a Faulty Capacitor
Check the physical condition of the capacitor before testing it. A swollen, cracked, leaking, or visibly damaged capacitor should be inspected carefully and replaced if it is no longer safe to use.
Tools Needed to Check a Capacitor
To perform the test, you need a digital multimeter with a capacitance measurement function. Capacitance is measured in farads, with common units such as µF and nF.
Digital Multimeter
Use a digital multimeter that has a capacitance or CAP mode. This feature allows the meter to measure the capacitor's capacitance directly.
The Capacitor Being Tested
Prepare the capacitor you want to test and check the rated value printed on its body. This value will be used as a reference when comparing the measurement result.
Steps to Measure a Capacitor with a Digital Multimeter
Once the tools are ready, you can perform the measurement step by step. Take your time and make sure the capacitor is safe before connecting the probes.
1. Discharge Any Remaining Charge
The first step is to make sure the capacitor no longer holds an electrical charge. A capacitor can retain stored energy even after the circuit has been turned off, especially in higher-voltage applications.
Use a safe and appropriate discharge method based on the capacitor type and voltage rating. Do not simply short the two terminals together because this can create a spark and may damage the component.
2. Disconnect the Capacitor from the Circuit
Remove the capacitor from the circuit before measuring its capacitance. Testing a capacitor while it is still connected to other components may produce inaccurate readings because the multimeter can also be affected by the surrounding circuit.
Once removed, check the terminals again to make sure there are no remaining connections.
3. Set the Multimeter Function
Turn on the digital multimeter and select the capacitance or CAP function. Depending on the model, this function may be marked with a capacitor symbol or the word CAP.
If the multimeter uses a manual range, choose a suitable measurement range. Make sure the capacitor's rated value is within the meter's measurement capability.
4. Connect the Probes to the Capacitor Terminals
Connect the multimeter probes to the two capacitor terminals. For polarized electrolytic capacitors, pay attention to the positive and negative terminals and follow the instructions for your particular multimeter.
Once the probes are connected properly, wait for the reading to stabilize. Avoid judging the result before the measurement is complete.
5. Read the Measurement Result
Look at the capacitance value displayed on the multimeter. Compare this value with the rated capacitance printed on the capacitor.
If the measurement is within the tolerance specified by the manufacturer, the capacitor is likely still in good condition. If the reading is significantly different from the rated value, the capacitor may have lost performance or become faulty.
How to Tell if a Capacitor Is Good or Faulty
The measurement result can be used as one of the main references when checking a capacitor. However, the result should not always be considered on its own, especially when testing components used in important electrical equipment.
A Capacitor in Good Condition
A good capacitor will generally show a capacitance value close to its rated value. For example, if the capacitor body shows a specific value in µF, the multimeter reading should be around that value within the tolerance specified by the manufacturer.
A Capacitor with Reduced Capacitance
If the measured value is significantly lower than the rated value, the capacitor may have lost some of its capacity. Depending on its role in the circuit, this can affect the performance of the equipment.
A Faulty Capacitor
A capacitor may be considered faulty if it gives an abnormal reading, does not provide a suitable capacitance measurement, or shows visible physical damage such as leakage or swelling. For a more reliable diagnosis, additional tests may be needed depending on the capacitor type and the capabilities of the multimeter.
Tips for More Accurate Capacitor Measurements
Before testing, make sure the capacitor has been disconnected from the power source and safely discharged. Use a suitable multimeter and pay attention to the measurement unit so you do not misread the result.
Check the Capacitor Rating Before Testing
Read the capacitance value and tolerance printed on the capacitor body. These specifications are important references when evaluating the multimeter reading.
Use a Multimeter with a Capacitance Function
A multimeter with a capacitance mode makes testing easier because it can directly display the measured capacitance. Make sure the meter's measurement range is suitable for the capacitor.
Never Measure a Capacitor Connected to a Live Power Source
Do not test a capacitor while it is connected to a live power source. Apart from producing inaccurate readings, this can create a safety hazard and may damage the multimeter.
Check the Physical Condition of the Capacitor
Do not rely only on the measurement result. Inspect the capacitor for swelling, leakage, cracks, or damaged terminals. These physical signs may indicate that the component should be replaced.
Checking whether a capacitor is good or faulty with a digital multimeter is relatively simple when done correctly. The process starts by safely discharging any remaining charge, disconnecting the capacitor from the circuit, selecting the capacitance mode, connecting the probes, and reading the measurement result. The reading can then be compared with the capacitor's rated value and tolerance.
For easier electrical testing and component inspection, make sure you use the right measuring instrument. If you are looking for a digital multimeter for electrical testing and measurement needs, check out the range of digital multimeters available at Listrik Kita and choose one that matches your requirements.
